A pump, a tank, and a tap. That’s all a van water system actually is. If you’ve spent any time in the van build forums though, you’d be forgiven for thinking otherwise. The rabbit holes go deep: filtered drinking systems, separate grey tanks, food-grade LLDPE containers, 12V diaphragm pumps with pressure switches, and somewhere around hour three you’re comparing stainless steel faucet heads that cost more than some entire budget builds.
The actual cost of a functional van water setup, one that gives you running water for cooking, washing up, and basic hygiene, lands somewhere between $50 and $120 total. And that’s not cutting dangerous corners. That’s just building what you need and skipping the rest.
There’s a version of this I used to overcomplicate myself, which, looking back, is embarrassing. So let’s go through what actually matters.
1. What You Actually Need, and What You Don’t
Five components. That’s the complete list for a basic van water system.
A container to hold fresh water. A 12V pump to move it. Tubing to carry it somewhere useful. A faucet or tap to control the flow. And an inline strainer to keep debris out of the pump inlet. Every other component you see in a build thread is either a sensible upgrade for later or something that makes the builder feel better about the setup rather than actually improving daily use.
The strainer is the one most beginners skip. It’s a $5 to $8 piece of mesh fitted between the tank outlet and the pump inlet, and it stops sediment from slowly destroying the pump’s intake valves. Not dramatic. Not expensive. Skip it and you’ll be replacing a pump in six months wondering what went wrong.
Here’s the breakdown Budget Van Journeys readers have consistently found most useful, because it separates what’s genuinely essential from what’s marketed as essential:
| Component | Essential? | Approx. Cost | Notes |
|---|---|---|---|
| Fresh water tank (20–40L) | Yes | $10–$35 | Food-grade jerry can or dedicated tank both work |
| 12V inline water pump | Yes | $15–$35 | Flojet and SHURflo are the reliable budget names |
| 10mm food-grade silicone tubing | Yes | $8–$15 | Buy by the metre, not in kits |
| Simple faucet or tap head | Yes | $5–$15 | Stainless vs. plastic is a personal call |
| Inline strainer | Yes | $5–$8 | Often sold as a “Y-strainer” |
| Water filter for drinking | Optional | $20–$60 | Real need vs. reassurance depends on your source |
| Pressure accumulator tank | Optional | $20–$40 | Smooths pump pulsing, not needed on small systems |
| UV steriliser | Optional | $30–$80 | Overkill for most van use cases |
The filter question comes up constantly. If you’re filling from tap water at campgrounds and rest stops, a basic inline sediment filter is a sensible $15 purchase. If you’re filling from non-treated sources, or plan to drink the van water directly rather than buying bottled, a two-stage setup with a carbon block stage makes more sense. And if you’re filling from good municipal taps and mostly using the van water for washing rather than drinking, you probably don’t need a filter at all. That decision is only possible once you know your own habits after a few real weeks of van life, so don’t buy one speculatively.
2. Choosing a Tank Without Getting Pulled Toward the Expensive Option
The most expensive van water tank is not necessarily the most useful one.
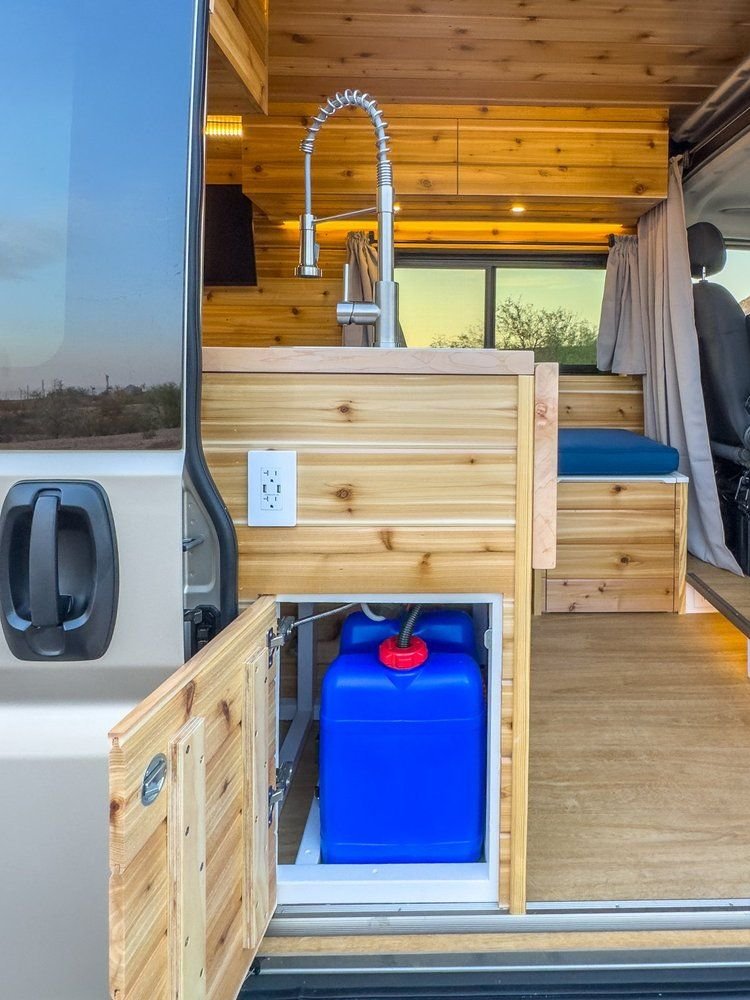
Dedicated RV water tanks, the moulded plastic tanks designed to mount under a bench or behind a panel, run $60 to $180 depending on size and brand. They look tidy inside a build, they often come with fittings already installed, and they feel like the “proper” solution. But a 40-litre food-grade HDPE jerry can from a camping or automotive supply store does exactly the same job for $15 to $25, and can be removed and carried to a water source when needed. The dedicated tank is bolted in permanently. The jerry can goes with you.
The ability to carry the tank to the tap is genuinely underrated. Try filling a 40L fixed tank through a small inlet port a few times, waiting for it to trickle in, and then decide whether the aesthetics are worth the hassle. Most people who start with a mounted dedicated tank end up adding a portable container alongside it anyway, for exactly this reason.
Size matters more for how you actually live than most builders acknowledge before their first trip. Two litres per person per day is a rough baseline for cooking and basic handwashing. If you’re also washing dishes, doing body wipe-downs, maybe rinsing your feet after a beach day, you’re closer to four to five litres daily. A 20L container lasts a solo traveller four to five days at moderate use. A 40L stretches closer to ten. That calculation determines how often you’re making water runs, which in turn affects how freely you can pick overnight spots. The free overnight parking guide covers how water access factors into those campsite decisions, and it’s worth reading alongside this.
Whatever container you choose, confirm it’s food-grade before you commit. The coding you want is HDPE (plastic number 2) or polypropylene (number 5). Containers marked with numbers 3, 6, or 7 can leach chemicals into the water over time, particularly with temperature variation. It’s not fearmongering. It’s a ten-second check before you buy.
3. Fitting the Pump Correctly: The Step People Rush and Later Regret
A 12V diaphragm pump like the Flojet 2.9 or the SHURflo 2088 runs on direct 12V power, draws water from the tank via the inlet side, and pushes it toward the tap. These pumps are self-priming up to about 1.8 metres of vertical lift, which means as long as the pump sits no more than 1.8m above the water level in the tank, it’ll draw water without being pre-filled. Most van installs position the pump closer to the tank than that, so this usually isn’t a concern.
The installation sequence that avoids most common problems:
Step 1: Position the tank. It doesn’t need to be permanently fixed yet. Somewhere accessible, lower in the van, near a panel or floor area you can route tubing through.
Step 2: Fit the inline strainer to the tank outlet using a barbed fitting and a hose clamp.
Step 3: Run tubing from the strainer to the pump inlet. Keep the run as short as reasonably possible. Longer inlet runs are workable, just slightly less efficient.
Step 4: Connect the pump outlet to your faucet via more tubing. The pump pushes on this side, so run length is less critical here.
Step 5: Wire the pump to a 12V fused circuit. Most pumps in this size draw 3 to 7 amps at full load, so a 10A inline fuse on the circuit is appropriate. Running the power through a basic on/off switch lets you isolate the pump when the van is parked long-term.
The pump runs whenever the tap is open, and will often cycle briefly when pressure drops in the line even with the tap closed, this is normal pump behaviour, not a fault, but it catches people off guard the first few nights in the van.
Where builds go wrong here, and this comes up again and again, is skipping the hose clamps. Barbed fittings without clamps rely entirely on friction. In a moving vehicle with constant vibration and temperature swings, friction connections hold until they don’t. A pack of appropriately sized stainless steel hose clamps costs $5. Use them on every barbed connection on both the inlet and outlet sides. Every one.
If you’re working out where the water system fits within a broader build budget, the van build under $5,000 breakdown puts the different components in priority order. Water and power are the two systems worth doing properly even on the tightest build budget. Almost everything else has a cheaper workaround.
4. Grey Water and Drainage: The Part Nobody Plans Properly
The fresh water side gets planned obsessively. The grey water side gets improvised on day one, and that improvisation almost always involves a bucket.
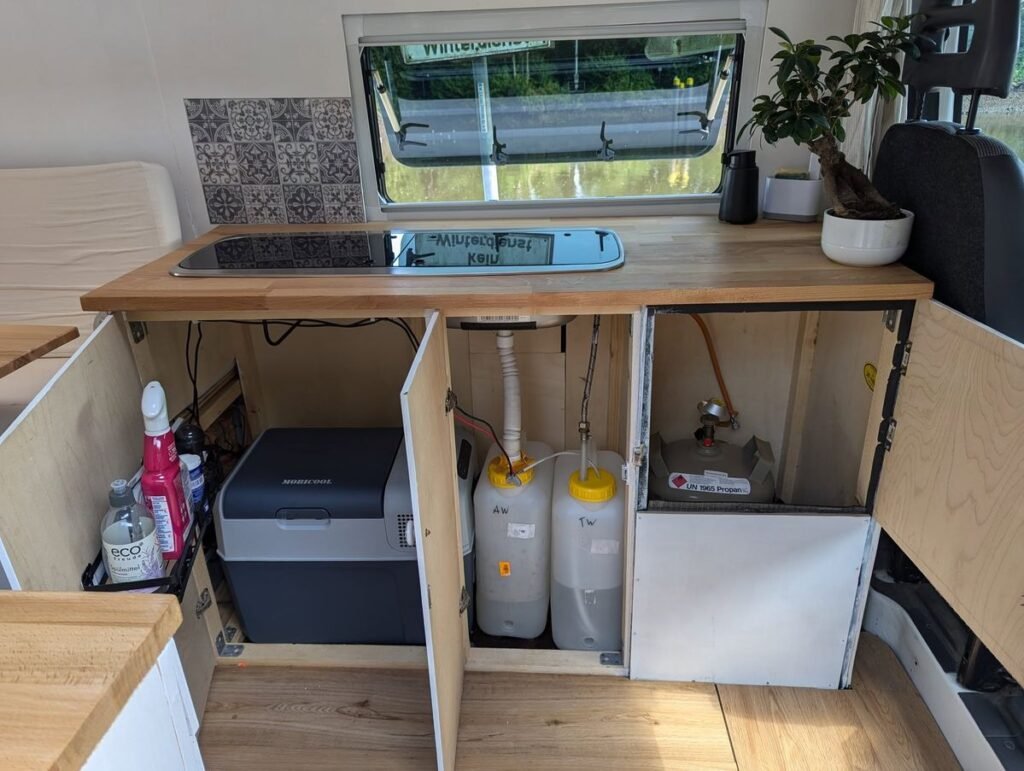
Grey water from a van sink doesn’t require a complex drain system. What it needs is a dedicated container you can empty regularly and a drain line that doesn’t drip inside the van. The simplest workable setup: a kitchen drain fitting in the sink, routed down through a waterproof bulkhead gland in the floor or out through a low side panel, leading to a removable 10L bucket or a small purpose-made grey tank.
A 10L removable container handles about two to three days of light use for one person. It needs emptying more often than most people initially plan for, and the places you can legally dispose of grey water are more restricted than the forums suggest. Developed campgrounds typically have a designated dump point. Dispersed camping on public land varies significantly by jurisdiction. Dumping it on open ground near a water source isn’t fine even if it’s just washing-up water, and being clear-eyed about that matters.
Actually, I should say here: the grey water situation connects directly to broader questions about managing hygiene on the road without a bathroom setup. There are practical alternatives that take a lot of pressure off the grey water system altogether. The van hygiene guide goes into those options properly, and it’s worth reading alongside the water system planning.
The upgrade path, when you want it, is a dedicated grey water tank with a vent and drain valve mounted in an accessible spot. But that’s a second-build decision. For a first setup, the removable 10L bucket is entirely functional and costs under $10.
5. Where Budget Builders Actually Overspend on Water
The pattern I’ve watched play out over the years writing for Budget Van Journeys is that people spend twice what they need to on the water system by making two very specific mistakes.
The first is buying too much tank. A 60L or 80L fixed tank sounds liberating right up until you’re filling it from a campground tap flowing at half a litre per minute. Bigger tank means longer fills. And in most real van travel, you’re near enough to water sources every two or three days. A 20L portable container plus a 20L backup covers almost every realistic scenario and costs a fraction of a dedicated large moulded tank.
The second mistake is paying brand premium on the pump. There are SHURflo pumps selling for $120 and Flojet variants for $28 that perform identically for standard van use. The build quality difference matters in marine applications where pumps run continuously for extended periods. In a van where the pump cycles on for a few seconds at a time, multiple times a day, the premium is not a meaningful improvement for the price paid.
Overcomplicated builds from the start are one of the most consistent van build budget mistakes, and the water system is where it tends to happen first. Build the simple version. Live in the van for a few weeks. Find out what your actual usage looks like. Then expand the parts that are genuinely limiting you. The information you get from real use is worth more than any forum recommendation.
FAQs
How much water does one person realistically use per day in a van?
For basic cooking, handwashing, and rinsing dishes, roughly two to three litres daily if you’re being conscious about it. Factor in body wipe-downs, washing produce, and making hot drinks and you’re closer to four to five litres. Hot showers from a van system jump that number considerably, which is why most budget van travellers use gym facilities or free showers on the road for bathing and keep the van water for everything else.
Do you need a water filter in a van?
Not always. Filling from treated municipal taps, a basic inline sediment strainer is usually enough. Filling from non-treated sources or planning to drink the van water directly, add at minimum an inline carbon block filter rated to reduce bacteria and chemical contaminants. The cost difference is $15 to $40 and it’s worth it in that situation. Don’t buy one speculatively before you know your actual fill habits.
Can any food-grade container work as a van water tank?
Yes, as long as it’s HDPE (plastic code 2) or polypropylene (code 5), has a secure lid, and has an outlet port you can fit a barbed connector through. Jerry cans, large camping water carriers, and some food-grade buckets with tight-sealing lids all work. Avoid anything that previously held cleaning products or any non-food substance, regardless of how much you’ve rinsed it.
What’s the most reliable budget water pump for a first van build?
The SHURflo 2088-403-144 and the Flojet 2.9 GPM model are both widely used and reliable at the $25 to $40 price point. They’re stocked at automotive supply stores and available online. Avoid unbranded pumps below $15. The failure rate on cheap unbranded units is high enough that you’ll spend more replacing them than you saved buying them.
How do you protect a van water system in freezing temperatures?
Empty the tank and lines when temperatures are going to drop below zero. Water expanding in frozen tubing splits both fittings and the tubing itself, and those failures are often invisible until you’re back on the road and suddenly have no water. For brief cold spells, wrapping the tank in closed-cell foam and keeping the van interior reasonably warm is often enough. For sustained winter van travel, a collapsible container brought inside at night is a low-tech solution that genuinely works. There’s more on the cold weather side of van living in the van life in winter guide.