
The figure that gets quoted most often when people start researching van conversions is somewhere between $15,000 and $30,000. I’ve seen it repeated on forums, in YouTube comments, in Facebook groups where beginners ask perfectly reasonable questions and get met with a wall of expensive build posts. And every time someone quotes that number like it’s the only way, I think about how many people must have quietly closed the tab and walked away.
It isn’t the only way.
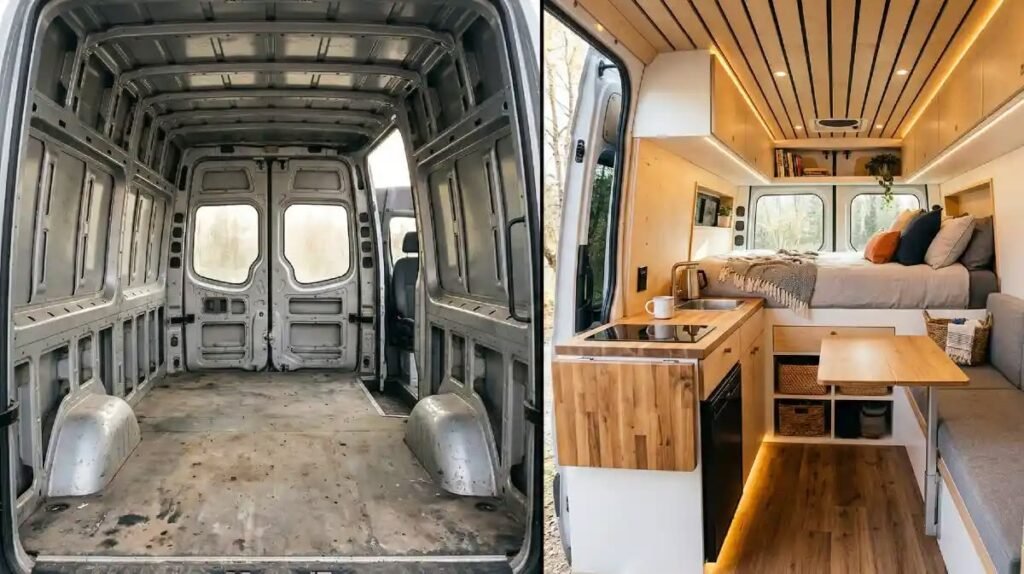
A sub-$5,000 van build is not a shortcut or a compromise. Done right, it’s a different set of priorities. You’re building what you need to travel and sleep comfortably, not what looks good in a Reels compilation. There’s a real difference between those two things, and once you understand which camp you’re in, the whole project becomes a lot cleaner.
This is the breakdown I put together for this very reason at Budget Van Journeys — because the full-price builds dominate the conversation, and the budget ones deserve honest numbers too.
1. The Van: The One Place Not to Cut Corners
Of your $5,000 total, the van itself should take $2,000 to $3,200 of it. That’s not a typo. The single biggest factor in whether a budget build succeeds or fails is the quality of the base vehicle. Everything else can be replaced cheaply. A bad engine cannot.
The Ford Transit (especially the 2006 to 2014 models) remains the most practical choice at this budget. Parts are widely available, mechanics are familiar with them, and high-roof cargo variants come up regularly on Marketplace for $1,800 to $2,800 with reasonable mileage. The Ram ProMaster is a good second option. The Mercedes Sprinter, while the van life aesthetic standard, is harder to source under $4,000 in any condition worth buying.
What to check before committing: rust under the wheel arches and along the chassis rails, water staining inside the cargo area (a surprisingly reliable indicator of a leaking roof seam or door seal), service history even if informal, and tyre condition. A pre-purchase inspection from a mechanic who works on commercial vehicles costs around $100 and is absolutely non-negotiable at this price range.
One thing that comes up repeatedly when people write in to Budget Van Journeys: they bought the van without an inspection, saved the $100, and spent $800 on a gearbox three months in. Don’t be that person.
2. Insulation and Flooring: Where the Build Either Works or Doesn’t
This section determines your quality of life in the van more than anything else, and it’s also the section where first-time builders most consistently get it wrong.
The instinct is to put money into visible things. Aesthetic wall panelling. Clever storage. Lighting. But a cold, damp van is an unliveable van, and the difference between a properly insulated build and a poorly insulated one becomes immediately apparent the first night you park up somewhere in October.
For a build that stays within budget, Thinsulate (marketed as MLI insulation for vans) is the practical choice. It runs around $150 to $200 for a full cargo van coverage. Unlike rigid foam board, it doesn’t require perfect cuts around curves and ribs, doesn’t trap moisture behind it the way foam can, and is straightforward to install without professional help. Stick it to the walls and ceiling, work it into the cavity behind the wheel arches, and tape the seams.
The floor is a secondary priority thermally, especially if you’re running it over a base layer of closed-cell foam mat ($20 to $30 at a camping store) before laying vinyl plank flooring on top. Total floor cost this way sits at $80 to $150 depending on van length. Clean, warm enough, and durable.
Total insulation and flooring budget: $280 to $380. This is money well spent.
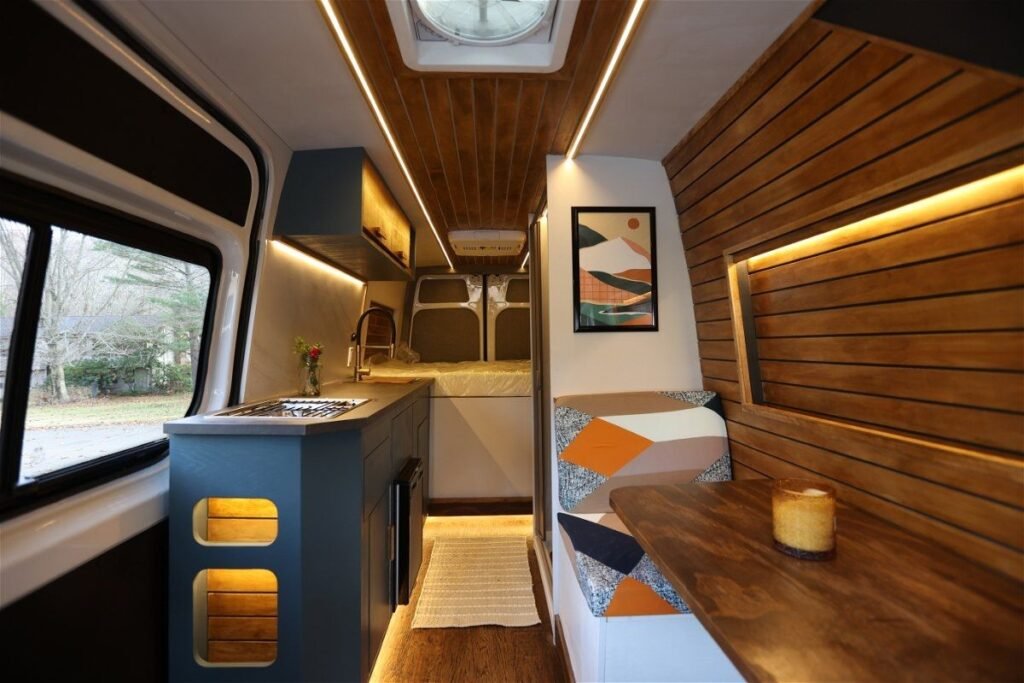
3. Power, Water, and a Bed: The Three Things That Actually Matter
Strip any van build down to its essentials and you get three things: somewhere to sleep, a power source, and water access. Budget for these first. Everything else is optional until you’ve lived in the van long enough to know what you actually want.
Power
The affordable setup that still functions properly: one 100Ah lithium battery ($200 to $280), a 200W solar panel ($120 to $160), and an MPPT charge controller ($40 to $65). Wire it with properly rated cable, add a fuse block, and you have a system that runs 12V USB charging, LED strip lighting, a 12V ventilation fan, and a small 12V compressor fridge if you choose to add one later.
Skip the inverter on a first build unless you work remotely and genuinely need 240V power. Most van life use cases run perfectly on 12V or USB. Adding an inverter complicates the wiring, draws standby power, and often ends up rarely used.
Water
You don’t need a plumbed-in water system. A 7-gallon fresh water jug feeding a small 12V on-demand pump to a single tap, with a second container catching grey water underneath, is a complete functional system. The pump costs $25 to $40. The jugs cost nothing if you source food-grade ones from restaurants or bakeries, which often give them away. Total water setup: under $70.
Bed
A platform bed built from plywood cut to the van’s internal dimensions, supported on simple wooden battens bolted to the van’s floor tie-down tracks: this is the standard budget approach and it works. Materials cost $60 to $100. A 4-inch foam mattress cut to size from a foam supplier or an outdoor equipment store costs $100 to $150 and sleeps better than many budget hotel mattresses, frankly.
Combined total for power, water, and sleep: $600 to $800.
4. The Actual Numbers: A Realistic Budget Table
Here’s what a $5,000 build actually looks like broken down into real costs, not aspirational ones:
| Component | Realistic Cost Range |
|---|---|
| Van purchase | $2,000 to $3,200 |
| Insulation (Thinsulate + foam) | $150 to $200 |
| Flooring (vinyl plank + foam underlay) | $80 to $150 |
| Solar panel (200W) | $120 to $160 |
| Lithium battery (100Ah) | $200 to $280 |
| MPPT charge controller | $40 to $65 |
| Wiring, cable, fuses, fuse block | $60 to $90 |
| Water pump + connectors | $25 to $45 |
| Bed platform (plywood + battens) | $60 to $100 |
| Mattress (cut foam) | $100 to $150 |
| Ventilation fan (Maxxair or budget equivalent) | $80 to $130 |
| Cooking (single-burner propane + small prep board) | $40 to $70 |
| Miscellaneous (sealant, screws, brackets, paint) | $80 to $120 |
| Total | $3,035 to $4,760 |
The range is wide because the van cost varies by region, timing, and what the seller knows about the market. In rural areas, clean Transits at $1,800 come up. In cities, $3,000 for the same van is normal. The rest of the build costs stay roughly stable either way, which is why the van purchase deserves the most careful attention.
5. What to Leave Out, At Least for Now
This is the section nobody writes, but it might be the most useful one. The van life content ecosystem is heavily skewed toward addition. New features, new upgrades, more systems. The question worth asking for a first build is not “what should I add?” but “what can I leave out without actually noticing?”
Diesel heater. Genuinely useful, but a good sleeping bag rated to around 10°F and a fleece liner gets you through most mild to cool nights without one. If you extend into real cold weather, add it later. Cost deferred: $150 to $500.
Indoor shower. Most campgrounds, gyms on short-term memberships, and truck stops have facilities. A $20 solar shower bag handles the gaps between. The space a shower takes up in a van is disproportionate to how often most people use it in the first three months. Build it later if you still want it.
Full wood panelling. It looks beautiful. It also costs $200 to $400 in materials and is purely aesthetic. Painted plywood walls with hooks and a pegboard panel provide the same storage function and cost almost nothing.
Fixed cabinetry everywhere. This one matters. I see it constantly in build photos, fully fitted cabinetry on every wall, and then the builder lives in it for two months and realises they put the kitchen on the wrong side or their storage needs are completely different from what they assumed. Build your sleeping platform and one kitchen bench. Keep everything else flexible for at least the first season.
Frequently Asked Questions
Is a van build under $5,000 actually liveable, or just technically functional? It’s genuinely liveable for most use cases. You’ll have insulation, climate control basics, running power, water, a comfortable bed, and a way to cook. What you won’t have is the aesthetic polish of a $20,000 build. The function is there; the finishes are just simpler. Most people who’ve done it say they stopped noticing within the first week.
What’s the most common mistake on a budget van build? Choosing the van based on price alone without inspection. A $1,500 van that needs $2,000 in repairs is a $3,500 van that also gave you a stressful week. Budget for an inspection, buy the cleanest vehicle you can at your price point, and trim costs on everything that can be replaced or deferred.
Can I do the electrical wiring myself with no experience? Yes, with research and care. 12V DC systems are forgiving compared to household AC wiring. The key is correct cable sizing for the current drawn (oversizing the cable is always safer), proper fusing between each component and the battery, and taking it slowly. YouTube channels that focus specifically on van electrical systems, not van aesthetics, are the most useful resource here.
How long does this kind of build take on weekends? For someone with basic DIY skills and no help, budget two to four weekends. Insulation and flooring take one full day if you’re organised. Electrical takes another. The bed platform is an afternoon. The rest is finishing work. Rushing the electrical is the only thing I’d push back on; take the extra time to do it properly.
Does van colour or style affect build cost? Not really, no. A white cargo Transit and a black one cost the same to build out. What does vary is the roof height. High-roof variants are almost always worth the slight cost premium if you’re over 5’6″, because being able to stand upright in your living space is one of those things you only understand the value of after sleeping in a low-roof van for a week.
The $5,000 limit focuses the build in a way that a $20,000 budget never does. You make better decisions. You ask “do I actually need this?” more often. And what you end up with is a van built around how you actually travel, not around how van builds are supposed to look.
Start simple. Get on the road. The rest can always be added later.