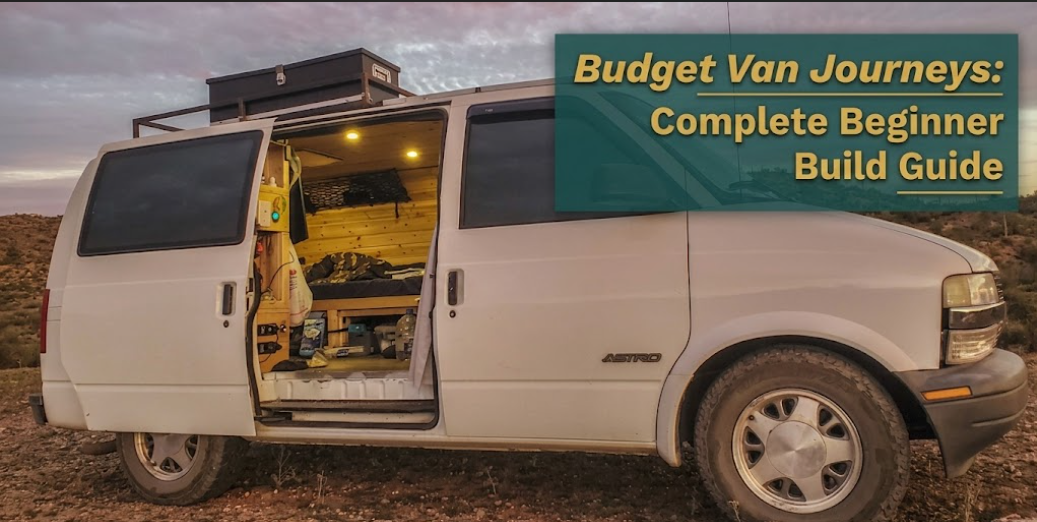
The thing I hear most often when people start researching van life is this: “I’d love to do it but I don’t have the budget for a proper build.” And what they mean, when you dig into it, is that they’ve been on Instagram, seen vans with teak flooring and designer lighting rigs and a ceiling full of handwired fairy lights, and decided that’s the baseline. It isn’t.
That version of a van build exists. It costs a lot. And most people living full-time or part-time in converted vans are not in one of those.
A functional, comfortable beginner build, one you can sleep in properly, cook in, charge your devices, and actually live out of for weeks at a stretch, does not require a professional conversion company or a five-figure budget. What it does require is a bit of planning upfront, a realistic sense of what you actually need versus what looks good on social media, and knowing what order to do things in before you buy a single sheet of plywood.
That’s what this guide covers.
1. Choosing the Right Van When Budget Is the Priority
The van decision comes before everything else, and it’s also where a lot of beginners lose money they didn’t need to spend. The natural instinct is to find the cheapest van on the market and throw a build in it. That logic backfires when the van breaks down twice before you’ve finished fitting the insulation.
For budget van builds, the sweet spot is usually somewhere between £3,500 and £8,000 for the vehicle itself, depending on age, mileage, and condition. Below that, you’re generally looking at vans with unknown service histories, which is a gamble that tends to pay out in expensive repair bills at inconvenient moments.
The most commonly recommended starting points for first-time converters are the Ford Transit, Renault Trafic, Mercedes Sprinter, and Volkswagen Transporter. Each has a large community around it, which matters more than people realise, because online forums and van life Facebook groups become your main troubleshooting resource when something stops working on a Saturday evening in a field.
The roof height question is worth taking seriously. High-roof vans cost more, both at purchase and sometimes in practical terms (multi-storey car parks, some ferry decks), but the ability to stand up inside your own living space is something that genuinely changes the day-to-day experience. More than most people expect before they’ve lived in one.
| Feature | High Roof Van | Standard/Low Roof Van |
|---|---|---|
| Standing room inside | Full height | Crouching or seated only |
| Build cost difference | Slightly higher (more ceiling to insulate) | Lower |
| Vehicle purchase cost | £500-£1,500 more typically | Cheaper upfront |
| Parking flexibility | Limited in multi-storey/some ferries | No restrictions |
| Best suited for | Full-time living, extended trips | Weekend use, short trips |
| Resale value | Generally stronger | Market dependent |
If you’re planning anything longer than occasional weekend escapes, the high roof is worth budgeting for. The low roof is absolutely workable for shorter trips, but most people who’ve spent a week living and cooking in a standard-height van in bad weather will tell you the same thing afterwards.
On mileage: a van with 160,000 miles and a complete service history is almost always a safer buy than one with 80,000 miles and a single entry in the logbook. Diesel engines in commercial vans are built to work hard. What shortens their lives is poor maintenance, not use.
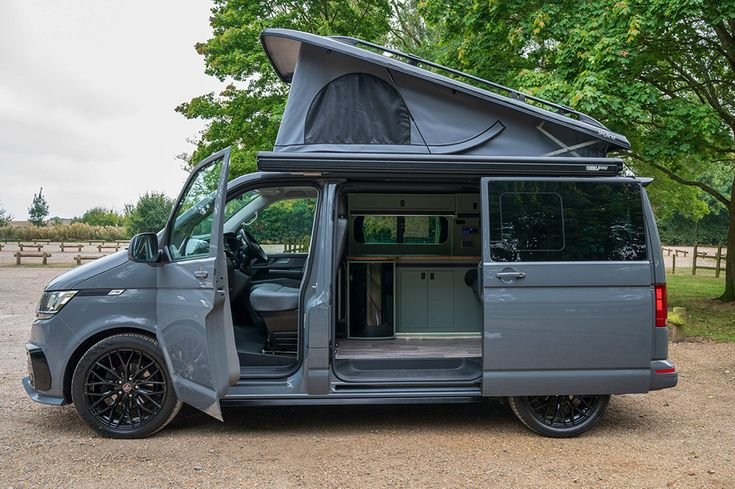
2. Plan Your Layout Before You Spend Anything on Materials
This is the step that separates builds that work from builds that get partially pulled apart and redone six months later.
The number of people who buy their van, get excited, go to a timber merchant, come home with a van-load of plywood, and start cutting, without a measured layout plan, is genuinely quite high. And then discover the wheel arches sit exactly where they wanted to put the bed platform. Or that the kitchen unit blocks the sliding door. Or that the bed, once built, doesn’t leave enough clearance to sit up without grazing the ceiling.
Sketch the layout on paper first. A rough top-down drawing, roughly to scale, with the van’s internal dimensions marked. Pencil, so you can erase. This is not about artistic ability. It’s about forcing yourself to confront the compromises before they cost you materials and time.
The key questions to settle before you draw anything:
Fixed or convertible bed? A fixed bed platform is simpler to build, more comfortable to use, and doesn’t require any faff at the end of the day. It does take up a permanent section of floor space. A convertible setup (a sofa or dinette that folds into a bed) frees up that space during the day but requires more careful construction and more effort every night. For solo travellers and couples doing extended trips, a fixed bed is usually the right call.
Where does the kitchen go? Usually along one wall, ideally close enough to the sliding door that you can cook with the door open in decent weather. The proximity to the door also means ventilation, which matters when you’re frying something at 7am.
How much storage do you actually need? This depends entirely on what you’re carrying. A surfer needs board storage and wetsuit drying space. A remote worker needs a secure space for equipment. Someone doing short solo trips needs far less than a couple doing a year-long journey across Europe. The layout should reflect your life, not a generic van floor plan you found online.
The layout also affects where you run your electrical cables and water lines, so settling it before you start means you’re not chasing pipes through finished walls later.
3. The Build in the Right Order: Floor, Walls, Furniture
Once the layout is planned, the build follows a sequence. Jump ahead and you create work for yourself.
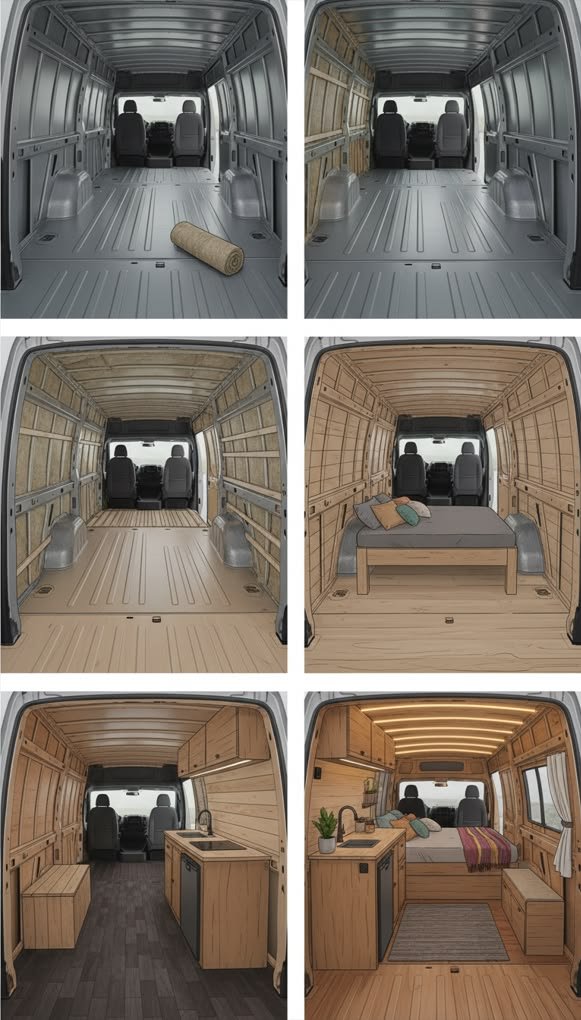
Start with the floor. Clean the bare metal, treat any surface rust with a rust converter, and don’t skip this step even if the rust looks minor. Small patches spread. For insulation, most budget builds use rigid foam board, typically Celotex or Kingspan at 25-50mm, cut to fit around the floor ribs, followed by a 9-12mm ply sheet on top as the subfloor base. This is also the point to lay any cable conduit if your electrical setup needs cables running under the floor.
Do the ceiling before the walls. The ceiling is the most important part of your van’s thermal performance. Heat rises, and an uninsulated or poorly insulated roof turns a cold night into a genuinely miserable one. Spray foam is popular for filling the ribs and awkward curved sections, combined with boards across the flatter areas. Don’t underestimate this bit.
Line the walls with ply. Cut 4-6mm ply panels to fit the van’s interior contours, glue them to the metal ribs using panel adhesive, and secure with screws where possible. This gives you a surface you can screw directly into later for shelving brackets, hooks, and fittings. It also makes the interior feel like a space rather than the inside of a metal box.
Build furniture from back to front. Start with the bed platform since it’s the largest fixed element and defines the remaining space. Then the kitchen unit. Then any additional shelving or overhead storage. Working this way means you’re always fitting into a space you can still stand in, rather than boxing yourself in.
A quick note here, because it comes up a lot on Budget Van Journeys and similar communities: ready-made campervan furniture units from specialist suppliers look appealing, and some are genuinely well-made. But they rarely fit the specific dimensions of your van perfectly, and the cost per unit reflects the premium market they’re designed for. Custom-built furniture, even for someone who has never touched a circular saw before, is achievable and almost always gives a better result for the space. There are good beginner carpentry tutorials specifically for van builds, and the tolerances required are far more forgiving than, say, building fitted wardrobes for a flat.
4. Electrics and Water: Where Beginners Get Into Trouble
These two systems are where most budget builds either run into unexpected costs or, in the case of electrics, create actual safety problems.
Start with a realistic electrical assessment. The standard beginner setup is a leisure battery charged via the van’s alternator while driving, plus a solar panel or two on the roof for stationary charging. From that battery bank, you run 12V LED lights, USB charge points, and potentially a 12V compressor fridge. Simple, reliable, and perfectly adequate for most use cases.
The common mistake is undersizing the battery. A 60Ah AGM leisure battery sounds reasonable until you discover it’s flat by mid-evening. For a setup with a compressor fridge running continuously and regular device charging, a 100Ah lithium battery is a sensible minimum. Lithium costs more upfront than AGM (often double or more), but it charges faster, discharges more deeply without damage, and lasts significantly longer in real-world use. If lithium is outside the budget, two 100Ah AGM batteries wired in parallel is a workable alternative.
What genuinely does matter, and where shortcuts cause fires: cable sizing and fusing. Every positive cable needs an inline fuse as close to the battery as possible. Wire must be rated for the current it carries. Cheap automotive wire from a market stall is not the same as properly rated cable. Electrical fires in vans start because of wiring shortcuts taken at the build stage that felt fine at the time. This is one area where spending a bit more on correct materials isn’t optional.
Water systems don’t need to be complicated. A small plastic tank under the bed, a hand pump or 12V pump, a small sink unit, and a waste water tank or bucket for grey water is all a beginner van actually needs. Hot water systems add significant complexity and cost, and most van lifers heat water on the stove or use campsite shower facilities until they’re certain they want the plumbing upgrade.
Two things to do properly from the start: use food-grade plastic for any fresh water tank, and make sure you can physically access the drain plug. If you can’t drain and rinse the tank easily, you won’t do it regularly, and then you’ll have bacteria and eventually mould in your water system. Not ideal.
The cost breakdown for a basic electrical and water setup sits roughly at £300-£600 for electrics if you do the install yourself, and under £150 for a simple water setup. Budget Van Journeys breaks down where the money actually goes in these systems, and where the premium products are worth it versus where you’re paying for a name.
5. Finishing Touches and What Actually Matters at the End
By the time you’re past the insulation, lining, furniture, and systems, the finishing work is mostly about comfort and storage optimisation. And honestly, this is the part most people enjoy most.
Ventilation is worth taking seriously. A roof vent or a Maxxair fan in the ceiling does two things: it pulls hot air out in warm weather, and it reduces condensation overnight. Condensation is a persistent problem in vans and it damages insulation, promotes mould, and makes the interior smell stale. A fan vent costs between £60 and £150 for a decent one and is worth every penny.
Window covering matters for privacy and insulation. Thermal blinds or bespoke cut foam window covers (the latter being a popular DIY project) keep heat in at night and block light for sleeping in. Custom foam covers for your specific van windows are about a day’s work with a camping mat and a sharp knife.
Small things that make a real difference in day-to-day van living: a magnetic knife strip instead of a knife block (saves counter space), a collapsible washing up bowl, a small shower caddy on the wall for toiletries, and a designated spot for your shoes that isn’t the middle of the floor.
The build will never feel completely “finished,” which is something every long-term van lifer will tell you. You’ll drive for a week and realise there’s a rattle from the kitchen unit you need to fix. Or that you need one more hook near the door. Or that the lighting angle is wrong. This is normal, and it’s part of what makes van life interesting. The van adapts as you learn how you actually live in it.
FAQs
How much does a beginner van build cost in total? The conversion work alone, covering insulation, lining, a basic bed platform and kitchen unit, and a 12V electrical system, typically runs £1,500 to £3,500 if you’re doing all the labour yourself and sourcing materials at normal retail prices. The van is additional. A reasonable used van for a first build comes in anywhere from £4,000 to £9,000 depending on age, make, and condition.
Do I need to register my van as a motorhome after converting it? In the UK, if your van has permanent sleeping accommodation, a fixed cooking area, and a dining space or storage, it may qualify to be re-registered as a motor caravan with the DVLA. This changes your V5C, affects your road tax category, and can affect your insurance terms. Not all builds qualify, and it’s not legally required to re-register if it doesn’t meet the criteria. Worth checking the DVLA guidance for the specific criteria before you assume either way.
Which van is best for a first budget build? The Ford Transit comes up most consistently well when weighing purchase price, parts availability, community knowledge, and long-term reliability. The Renault Trafic is a strong runner-up, especially for smaller builds. The Mercedes Sprinter is excellent but carries higher repair costs. The VW Transporter is popular but the second-hand prices reflect its following and can push it out of a tight budget.
Can I do a van build with no woodworking experience? The woodworking side of a van build, mostly ply cutting and assembly, is learnable by anyone comfortable using basic power tools. The electrical system is the part that benefits most from proper research or a check from someone experienced before connecting everything up. There are good guides specifically written for van build electrics, and the van life community online is generally willing to help beginners with specific questions.
How do I manage power on days when I’m not driving and it’s overcast? This is the gap that catches people out. The alternator charges while driving, and solar panels work on overcast days (just less efficiently). For days with little movement and poor sun, shore power hookups at campsites are the practical backup. If you’re planning to free-camp for extended periods without driving, sizing your battery bank generously and adding a second panel makes a meaningful difference.
The first build is rarely perfect. Mine certainly wasn’t, and neither is anyone else’s if they’re being honest about it. But the practical knowledge you pick up doing it yourself, understanding how the systems work and why they’re built the way they are, means that when something needs fixing or upgrading, you know exactly where to start. That’s worth more than a flawless finish on the first attempt.
Start with a plan. Buy the right van for your budget. Build in the right order. And don’t let the perfectly curated end results you see online convince you that anything less than that is a failure before you’ve even begun.